Curing your own green olives at home is easier than you think and far more satisfying than buying them from the store. All you need is fresh green olives, water, salt, and a bit of patience. Let’s walk you through this simple, traditional process and show you how to cure green olives the way we learnt from our families in Turkey.
What is Olive Brining?
Brining is a natural preservation method used to cure green olives, which are naturally bitter when freshly picked. Soaking them in a salty water solution helps draw out their bitterness and slowly transform their flavor into something rich and savory.
We follow a two-step process specifically for green olives:
- First, water curing to remove their intense bitterness.
- Then, brining to preserve them and enhance their flavor.
This traditional method results in firm, flavorful green olives. Perfect for breakfast tables, mezze platters, or snacking any time of day.
You Only Need 3 Ingredients to Brine Green Olives!
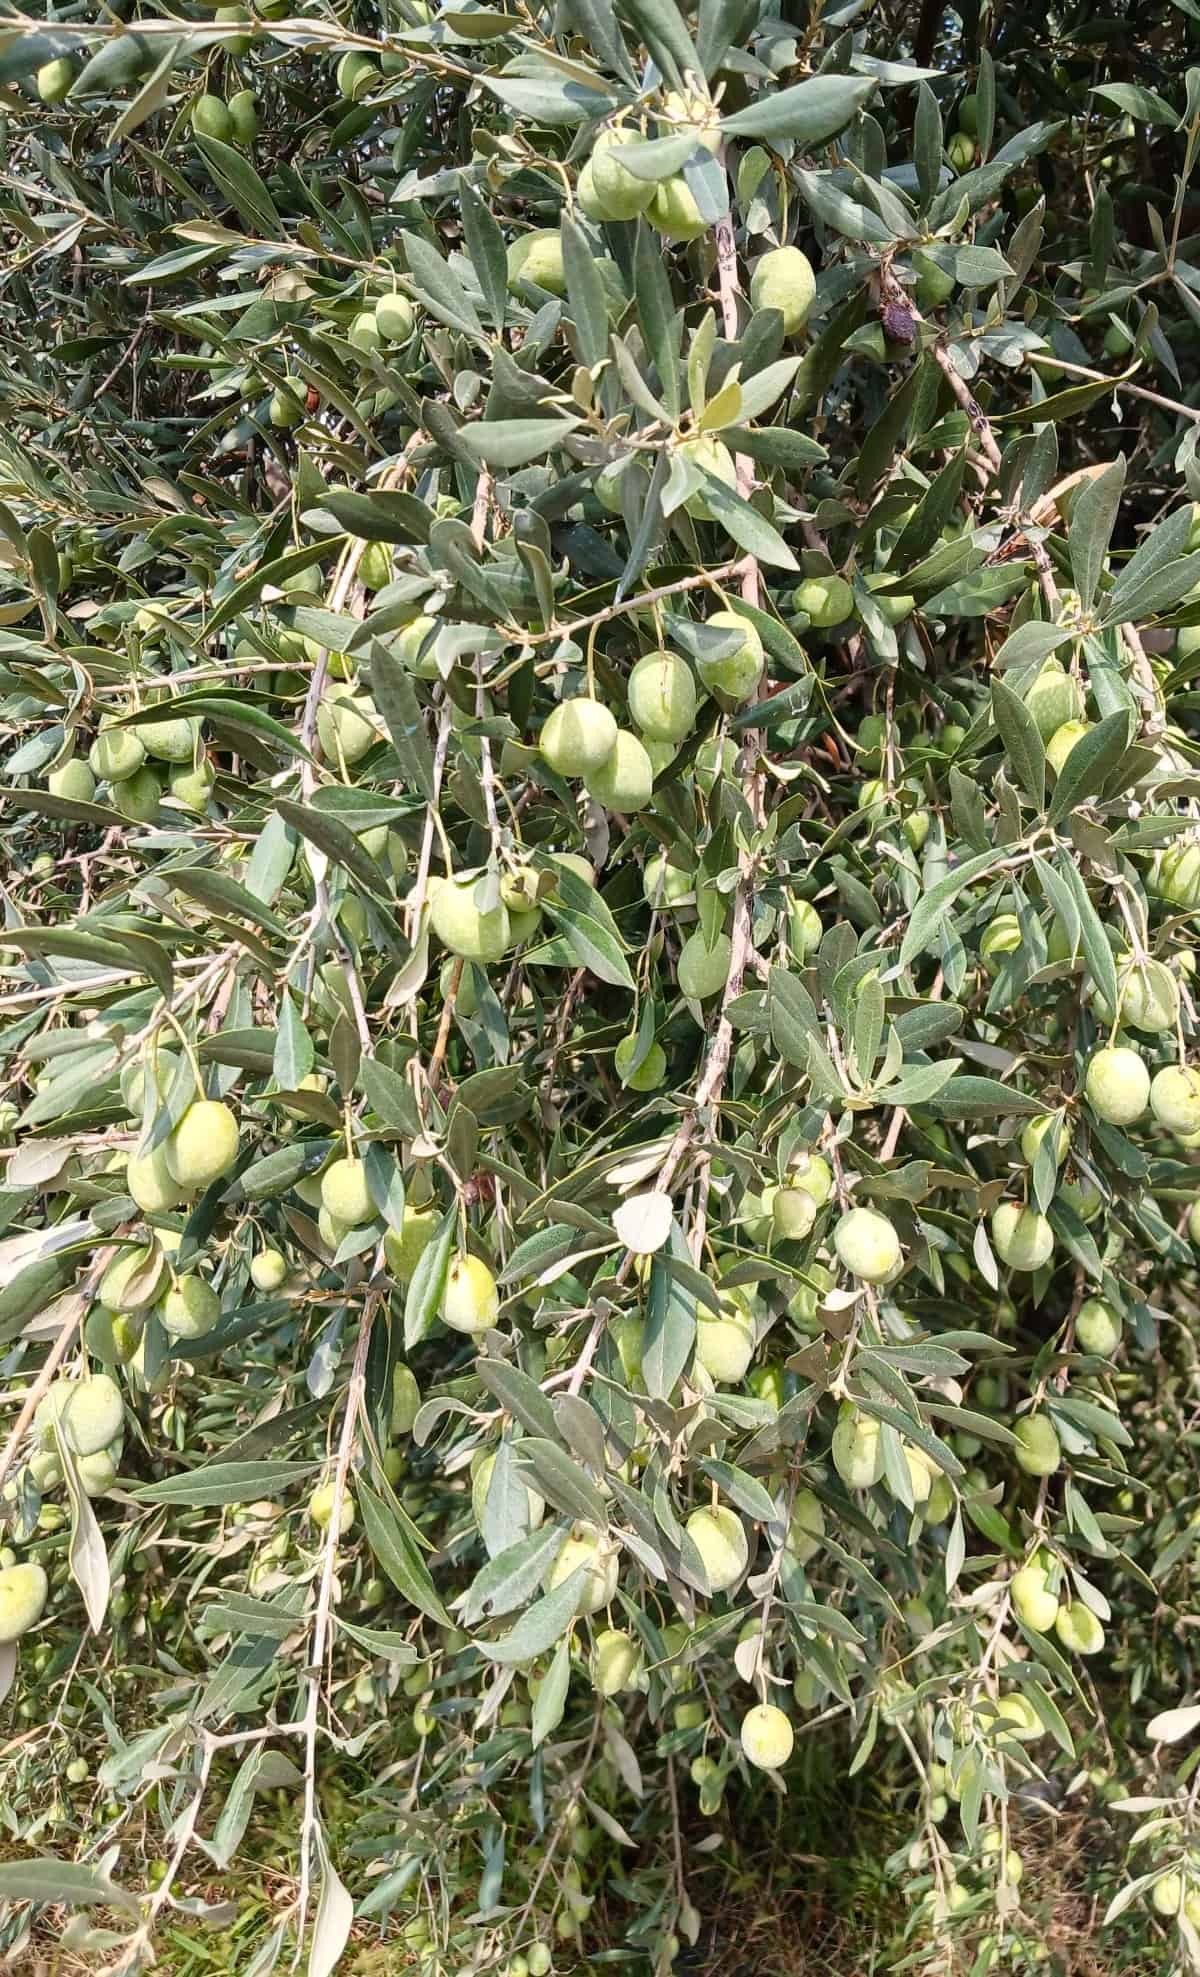
- Olives: Choose firm, unbruised green olives. Slight color variations are fine, but avoid mushy or overripe ones. The best green olives are available in late September and October.
- Water: Filtered or bottled water is ideal, especially if your tap water has a strong taste.
- Salt: Use kosher salt, sea salt, or pickling salt. Avoid table salt, which may contain additives that cloud the brine.
- Optional flavorings: Fresh rosemary, garlic cloves, chili peppers, lemon slices, bay leaves or thyme can all be added to the jar to enhance flavor.
How to Cure Green Olives
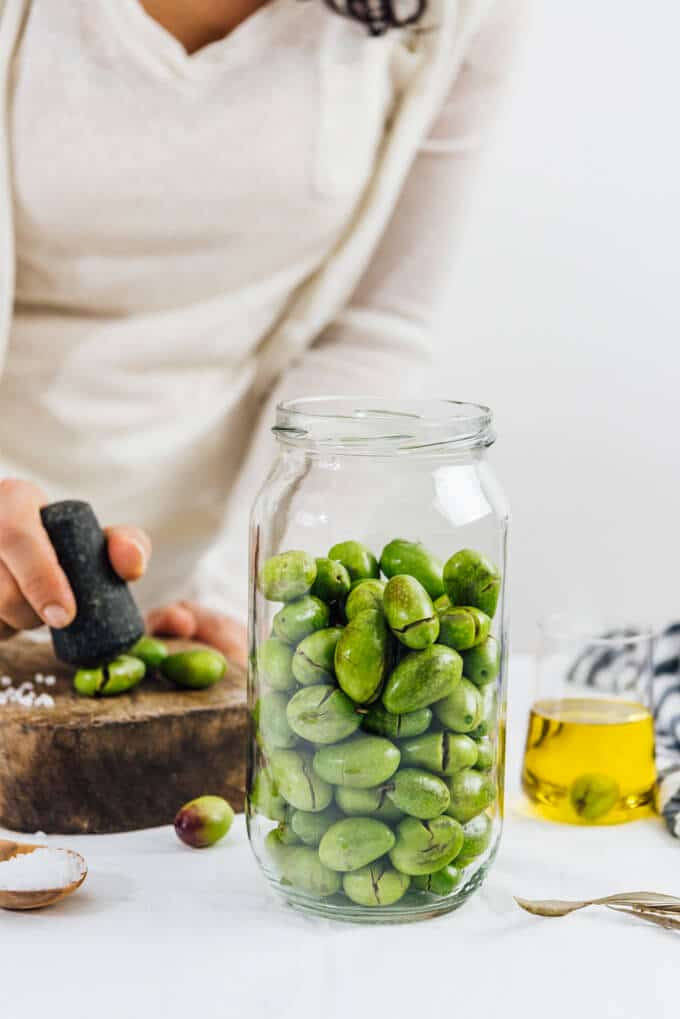
Start by rinsing the green olives and discarding any damaged ones. Then, gently crack each olive to help them release their bitterness during the soaking phase. You can use a mallet, the bottom of a glass jar, or even a stone, but avoid crushing them.
Once cracked, soak the olives in fresh cold water for 7 to 10 days, changing the water daily. This step is crucial for removing the natural bitterness. Taste them after a week to see if they need more soaking.
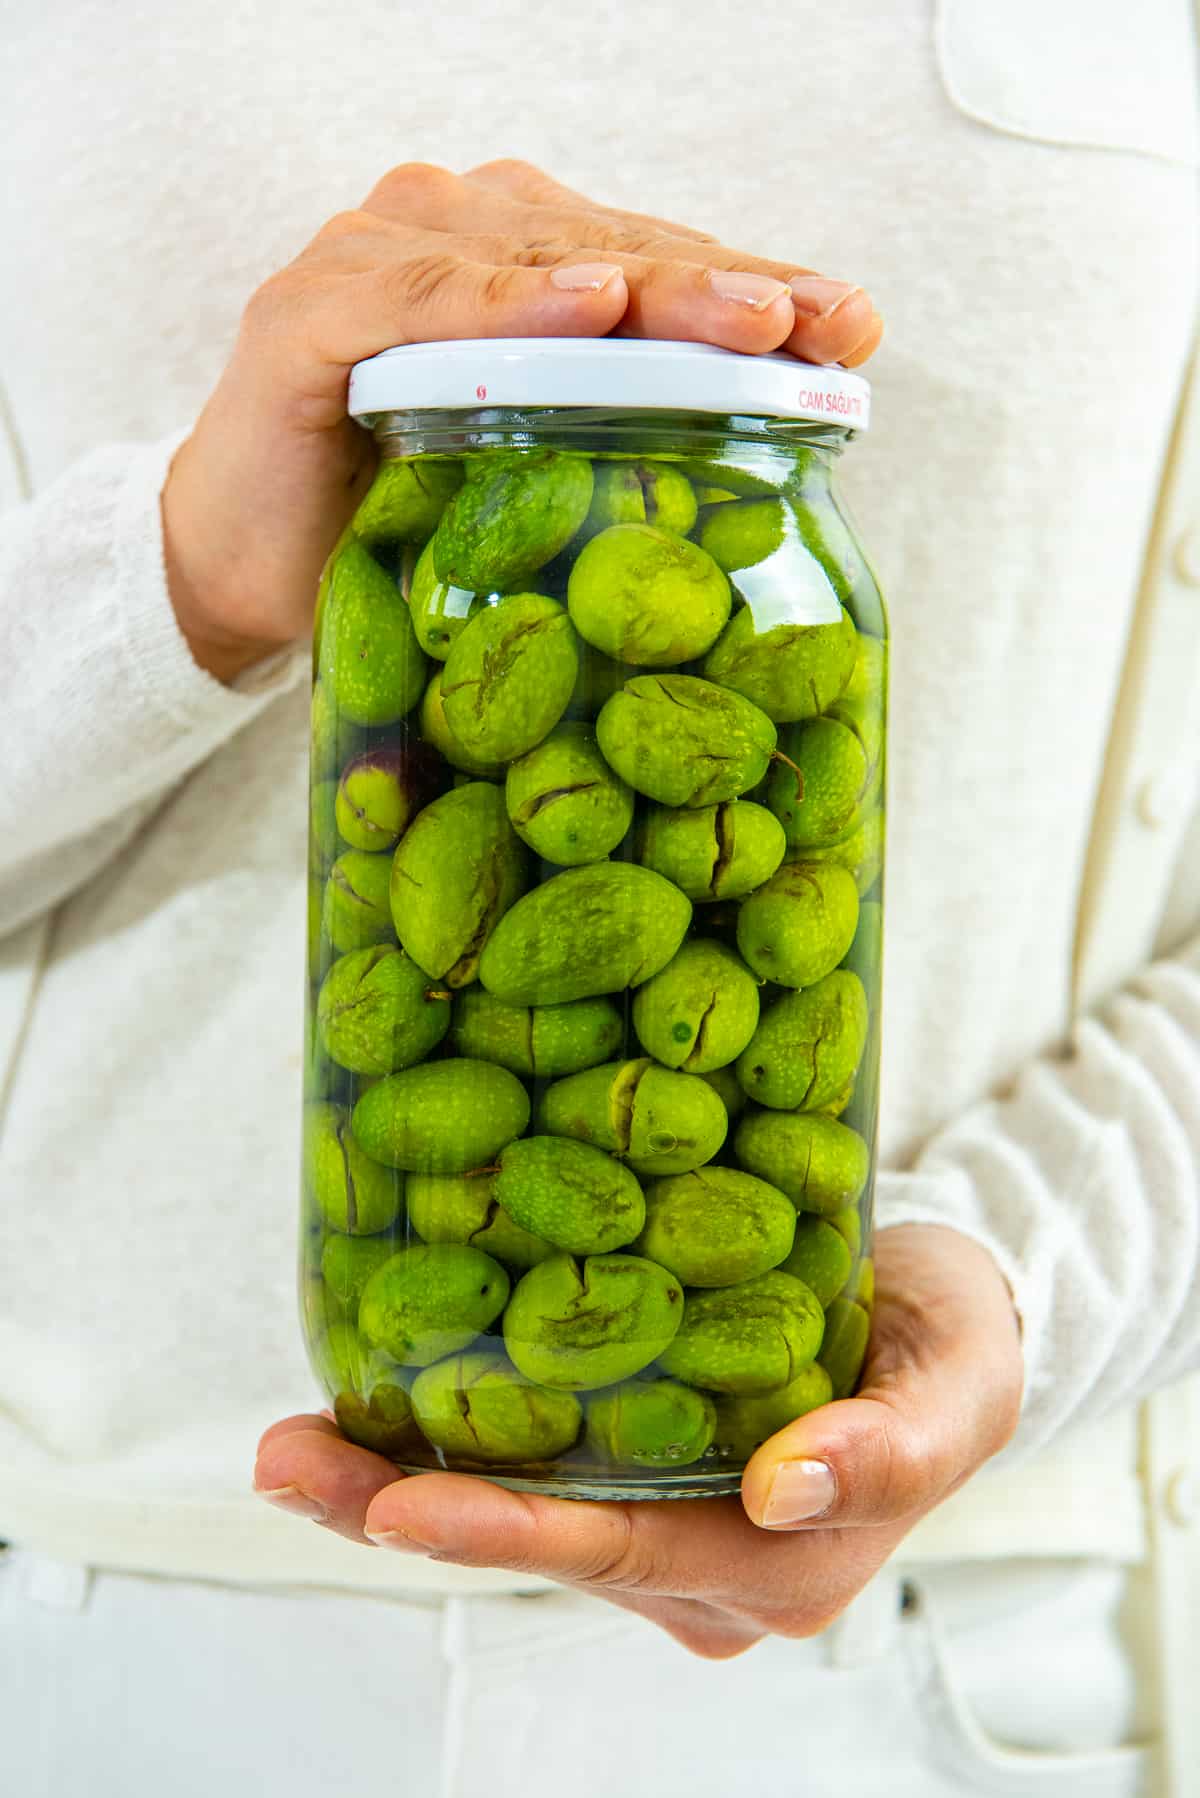
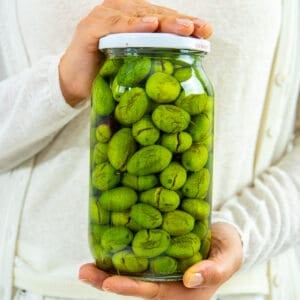
After the bitterness is gone, drain the olives and prepare your brine by mixing water with salt until fully dissolved. Pour this brine over the olives in a clean jar, ensuring they are completely submerged. You can add herbs or aromatics at this stage if you like. Close the jar tightly and let it sit for at least a week in a cool, dark place.
During the brining process, the olives will soften slightly and develop a deep, savory flavor. The longer they sit, the more intense the flavor becomes.
Don't Pit the Olives Before Brining!
It might be tempting to remove the pits before curing, especially for convenience, but we strongly recommend keeping them in.
The pit helps the olive retain its firm texture throughout the brining process and protects the flavor from leaching out.
Pitted olives often end up mushy and less flavorful. So for the best results, always cure olives with their pits intact.

How to Test the Right Salt Ratio for Olive Brine
We use an old but reliable trick we learned from our families in Turkey to make sure the brine has the right salinity:
- Fill your container with water.
- Add salt and stir until it dissolves.
- Gently drop a raw, uncracked egg into the water.
– If it floats, your brine has the right amount of salt.
– If it sinks, add more salt and try again.
Storage Tips
Brined green olives can be kept for up to a year if the jar is sealed and stored in a cool, dark place. Once opened, it's best to keep them in the refrigerator and consume within a few weeks. Always use a clean spoon when taking olives from the jar.
How to Prepare Brined Green Olives for Serving
Cured green olives are usually too salty straight from the jar. Here’s how we serve them:
- Take out the olives you plan to eat and rinse them under cold water.
- Let them sit in a bowl of cold water for 15 minutes to draw out excess salt.
- Drain well, then drizzle generously with olive oil.
- Add optional garnishes like lemon slices, fresh thyme, rosemary or chili flakes.
Tip: Once opened, always use a spoon to remove green olives from the jar. Avoid using your hands, it introduces bacteria and can shorten shelf life.
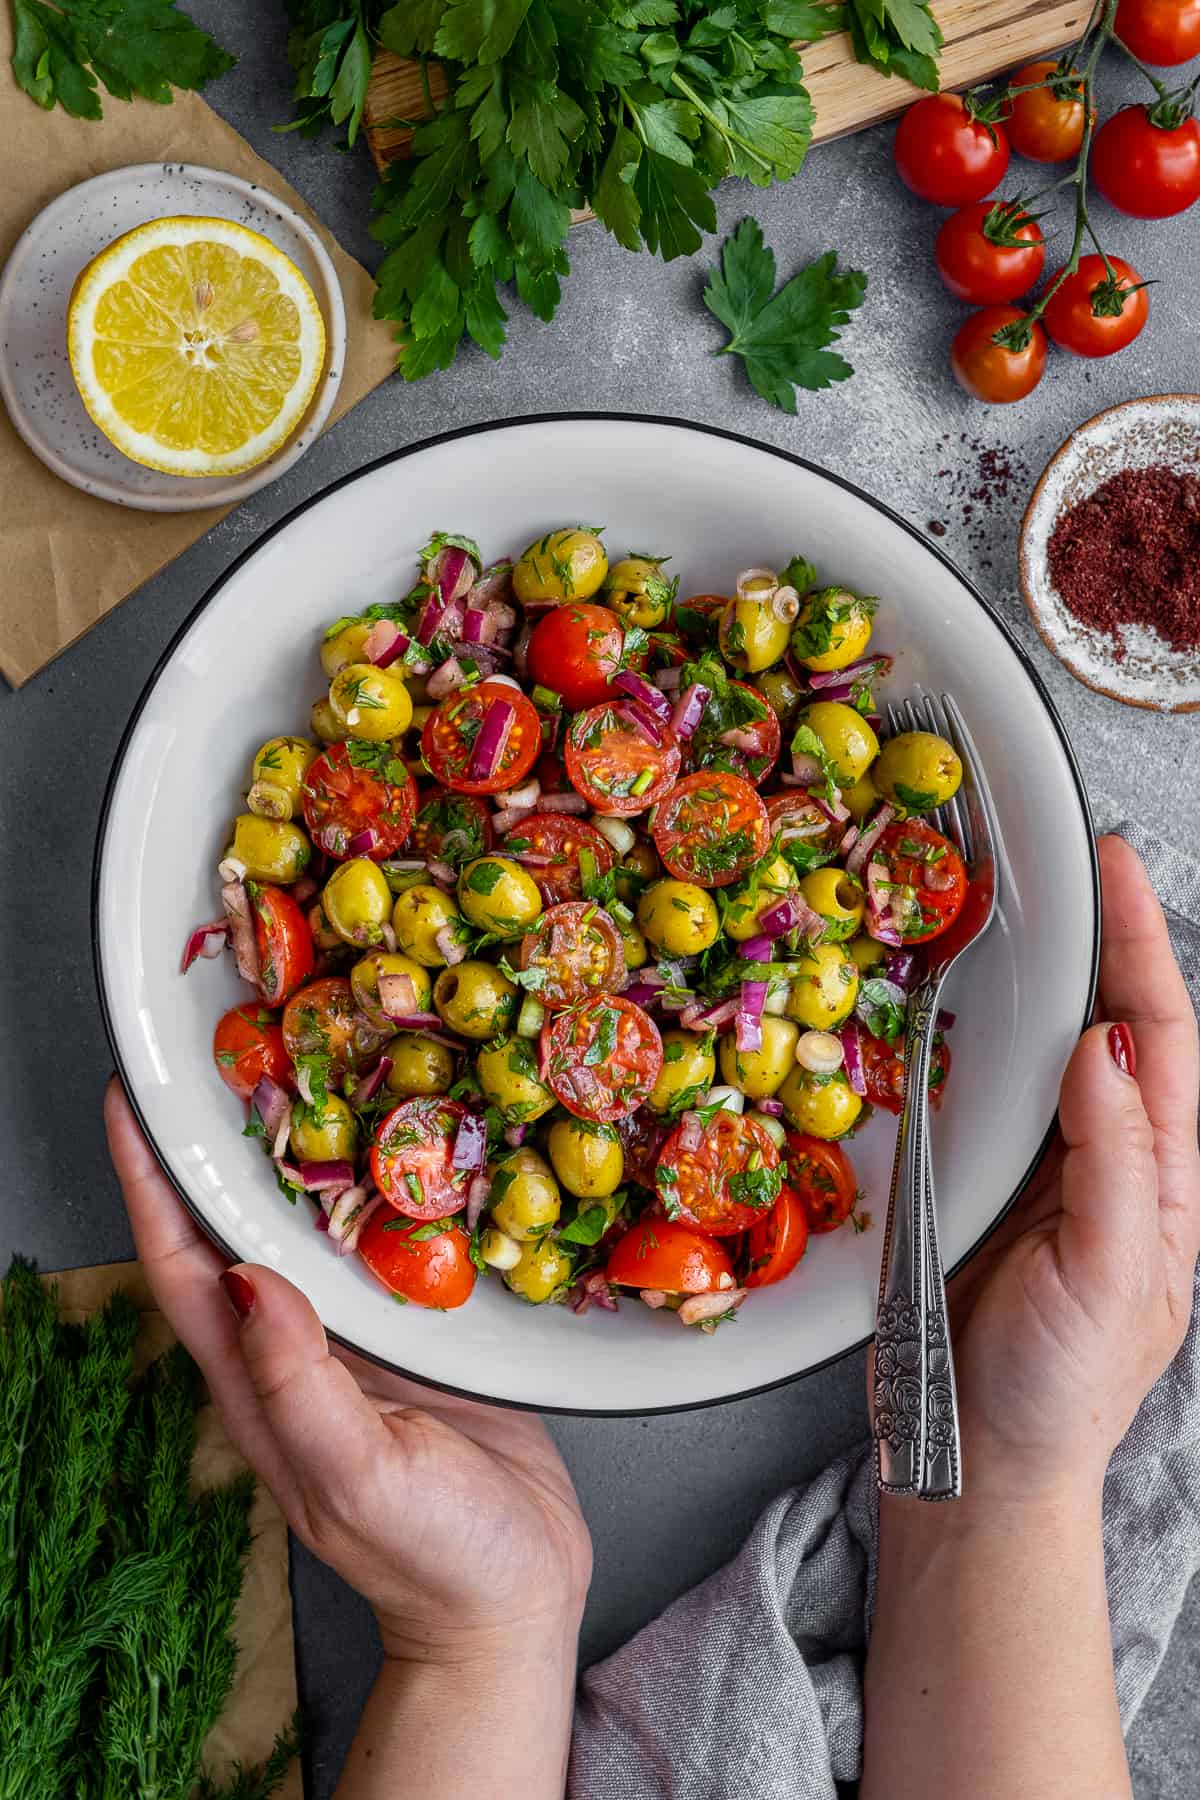
Ways to Enjoy Brined Green Olives
- Traditional Turkish Breakfast – served with cheese, tomatoes, cucumbers, and bread.
- Salads – add them to green salads for a salty punch.
- Tapenade – blend with garlic, capers, and olive oil for a savory spread.
- Snacking – simply enjoy with cheese or nuts.
- Garnish – perfect as a topping for Turkish baked potatoes or as a martini garnish.
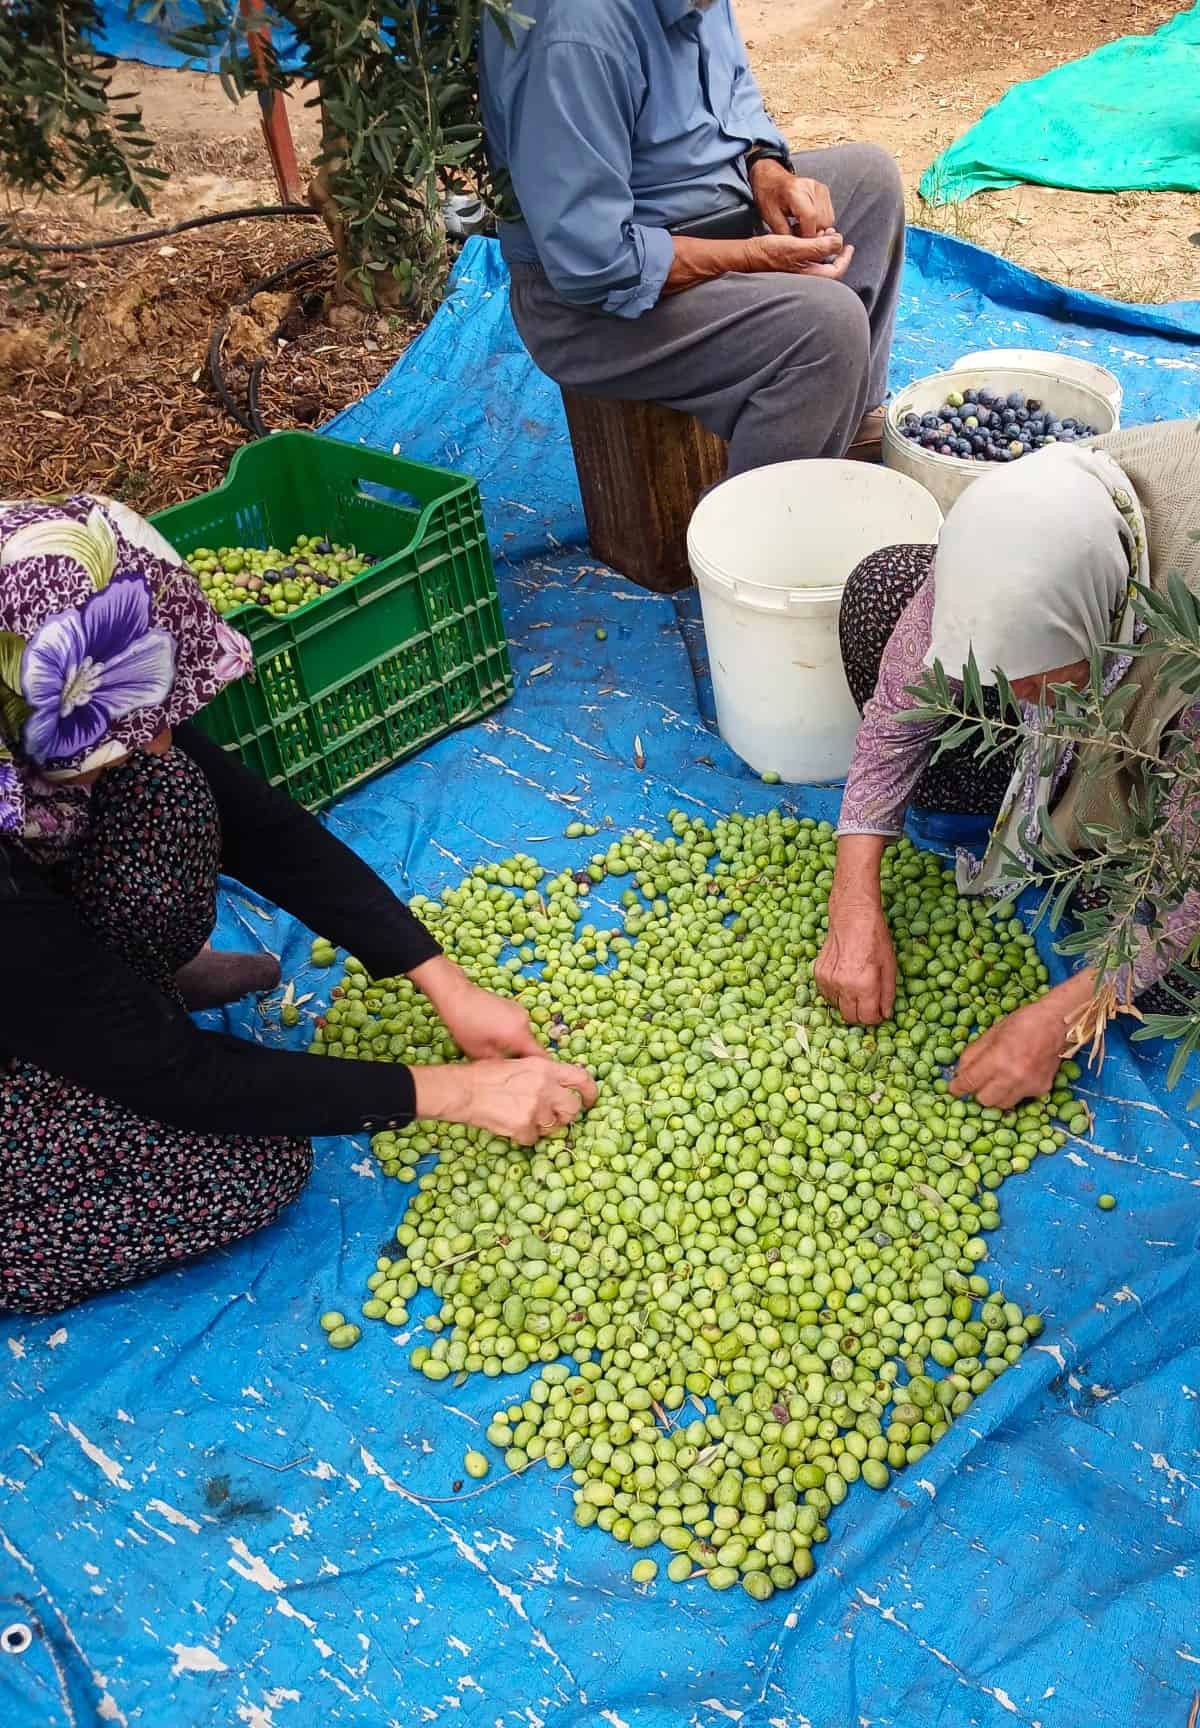
Olive Harvest in Turkey
In southern and western Turkey, olive harvest is a treasured tradition. Families gather in the fall to hand-pick olives, often turning the day into a social event. Some olives are sent for oil production, while others are preserved through curing methods like brining.
From sorting the olives under the trees to cracking them by hand, it's a communal process involving all generations. This deep-rooted culture brings a unique meaning and care to every jar of olives.
FAQs
Can I use black olives? They’re better suited for dry salt curing. Green olives are ideal for this method.
Why avoid table salt? It may contain anti-caking agents that cloud the brine and affect flavor.
Do I need vinegar in the brine? No, salt alone is sufficient for preserving olives.
How do I know if olives have spoiled? Discard them if they develop mold, an off smell, or a slimy texture.
More Recipes with Brine
Sign up for the FREE Give Recipe Newsletter to get the new recipes into your inbox!
And stay in touch with us on Facebook, Pinterest, YouTube and Instagram for all the latest updates.
📖 Recipe
How to Cure Green Olives (With a Simple Brine Method)
INGREDIENTS
- 2 pounds green olives
- 1 liter water
- 2 tablespoons kosher salt
INSTRUCTIONS
- Wash and sort the olives: Give your olives a good rinse under tap water. While you're at it, keep an eye out for any damaged ones or those with holes. Toss these out.
- Crack the olives: Take a mallet, the flat end of a jar, or even a stone, and gently tap each olive. You want to crack them just enough to see a bit of the flesh, but not so hard that you damage the pit. And, from our own experience, it's best to do this by hand, one olive at a time. There are gadgets out there that promise to make this step quicker, but we tried one and it was a letdown. A lot of our olives got squished instead of cracked.
- Keep the pits in the olives. This isn't just about texture – the pits help keep that classic olive taste. Olives can lose flavor if they're pitted before the brining process.
- An alternative way: Instead of cracking, you could make a small cut on each olive with a sharp knife. We find olives stay firmer when cracked, but this is up to you.
- Soak the olives in water: Put your cracked olives in a big jar and fill it with cold water. To make sure the olives stay under the water, put something heavy on top, like a small plate or grape leaves (that's what folks do back home).
- Change the water: Do this once a day for about 10 days. After this time, taste an olive. If it's still bitter, keep changing the water for a few more days.
- Make the brine: To get the mix right, fill a container with water, add salt, and stir.
- Brine the olives: Once your brine is ready, pour it into the jar with the olives (make sure you've drained the soaking water). The olives should be completely covered. To keep air out, put a piece of cheesecloth over the olives, then put the lid on. In about a week, they'll be ready to eat! They might look a little different – a change in color is normal.
- Optional flavor addition: Before you add the brine, you can put in some extra flavors. Think about adding rosemary, thyme, lemon peel, or chili.
NOTES
- Crack Carefully: When you crack the olives, be gentle. You don't want to hurt the pit inside.
- Keep Pits: Don't take the pits out. They help keep the olives tasty.
- Change Water: If you're soaking the olives to remove bitterness, remember to change the water every day.
- Make Enough Brine: If you have more olives, you can make more brine. Just use the same ratio of salt to water.
- Seal Tight: When you put the olives in brine, make sure the jar is closed tight. This keeps air out.
- Don't Use Hands: After opening the jar, use a spoon to take out olives. Touching them with your hands can bring in germs and spoil the brine.
- Store Right: Keep the jar in a cool, dark place. They keep well for a year.
- The nutrition facts are assumed for canned olives.
NUTRITION
Nutrition information is automatically calculated, so should only be used as an approximation.

Matteo BATEMAN says
I rinsed the olives off my tree for 10 days then submerged them in salt and water/brine. now is been 10 months. i opened them up they smell delicious. The water had little tiny bubbles coming to the surface. it it supposed to bubble?
Yusuf says
Hi Matteo, tiny bubbles are just normal.
Sonia says
Hi I just got a bag full of both black and green olives from my dad's tree. Some are half and half, ie Green on their way to being black (these, if more green then black, I put as Green and if more black then green, I treat as black). Any how, I had them in water for 3 days to rinse (changing water in between). Now I have seperated them into 2 jars (green & black) and done up a brine solution (1:10 salt and water solution). I have ensured they are fully submerged and today 20/05 is day two. I have put the jars in a dark dry place in the pantry. How long do I keep them here for? and also 1) do I need to agitate the jars daily and 2) do I need to change the brine solution and if so, how often?.
My hope is that once they are softened and not bitter that I can mix them up and put one half in an alternative sort of pickling bring solution with herbs etc and the other half under EVO with same herbs and spices. Is this possible? I am a first timer at this as my father always has done them in the past, but is not here to pass his knowlegde 🙁
Leigh says
Hi Sonia. This is only my personal preference from my experience.
Don't rush the initial curing stage. Cover with a 10% salt water solution, cover and leave somewhere for a long time.
I used to do two weeks, changing the water daily. This was still very bitter so I switched to four weeks, changing the water weekly after the initial two weeks. Still a hint of bitterness in the finished product.
Now I brine for a week then change the water, after which I left for four weeks checking periodically, then change the water and leave for another four weeks checking weekly. Don't do anything to them except when changing the water. Then I tend to wash the salt out of the bucket and stir in the new salt so that it is suspended in the water.
Melly says
Hi There, do you have measurement for how much salt you use in the water? The egg thing never really works for me , I have tried number of times in the past and I end up throwing the lot out after a few months -goes soft
Stienie says
100ml salt on 1 litre water.
Katie says
I've tried this recipe more than once, and the olives stay really crunchy and don't lose enough bitterness, no matter how many times I change the water bath. Is it something I'm doing wrong, or the variety of olives,or something else?
Yusuf says
Hi Katie, sorry to hear that. It is probably the type of olives. Otherwise, the bitterness should be removed after changing the water. Are they too bitter to eat?
Katie says
Pretty close to too bitter to eat. Also really crunchy. My friends and family taste test them, but don't like them.
TV Green says
I have 4 regular mason type jars with olives that are in a salt brine. These olives were not split, they are whole. It has been 4 months. They are soft, but still somewhat bitter and salty to taste. Should I replace the brine? Can I just use water? Thanks
Yusuf says
Did you wait them in water before putting them in the brine solution? That's how we remove their bitterness.
You can replace the brine if you like but with a new brine solution, not just water. On the other hand, if their bitterness is not too much, I wouldn't bother changing the brine. Whenever you want to use, take some in a bowl using a slotted spoon, pour water in that bowl and wait for 15-20 minutes or more. This will remove the salty flavor.
Hope this helps.
Steve Greenfield says
Help! I picked olives from my neighbor's tree. I washed them, slit them and placed them in a brine solution. That was in November, 2019. I changed the brine in December. Today, April 1st, 2020, I opened my jar and there was some strange gooey stuff floating on top? Grayish, fungus looking? Are my olives OK?
Yusuf says
Hi Steve! How are the olives? Are they still firm enough? If they are, then just remove that floating thing and transfer the olives in a new brine solution.
Andrew says
Thanks for your recipe. I have harvested about 10kg of mostly green olives with some semi semi-ripe and fully ripe olives. I cracked the green olives and slit the rest. They are now in a large black plastic container with a lid outisude, water changed the first time today. My question is where to keep the container? The weather in Cape Town is between 20 and 30 degrees Celsius for the next 2 weeks. Can the container remain outside? It may get hot due to it being black so interested to know where best to keep it. Thanks x
Yusuf says
Hi Andrew! My parents brine green olives in large amounts and the temperature where they live gets even higher than 30 degrees. I think there is nothing to worry about it. But still make sure you don't keep it under direct sunlight.
Esther says
Hi thanks for your recipe,I’ve just had my olives underwater with a weight and cheesecloth on for ten days and daily changed the water but I didn’t put a lid on them, because I missed that step. Do you think they will be ok to continue with. I now have them with the lid on in the salt brine, covered with weight and cheese cloth.
Yusuf says
Hi Esther,
They will be ok, don't worry. It's important to keep them covered when salt brining. Taste them after a few days and they are done if they are no longer bitter. This duration may be different for different types of olives.
Jorge Amorena says
if you have patient enough you can do green olives without cracking nor sliting them. Just do the same and hope for a year. you can see a proven recipe in https://www.youtube.com/watch?v=CxkN1bwJse4
Dimity Martin says
Hi, I'm in Australia and I've just picked some lovely green olives from a tree that was meant to be removed from the garden! I wanted to check if you're meant to put a lid on the jar for the first 10 days or leave the lid off and just use the weight? Hopefully My olives turn out well! Thanks, Dimity
Zerrin says
Hi Dimity! Put the lid on the jar. The olives in the photo you sent on Instagram are gorgeous! Would love to hear your feedback!
Chris says
Thank you so much!
Does it matter that my olives float to the top of the jar and as a result the top layer are exposed to the air?
I even added some olive oil at the top but the olives just keep rising!
Should I worry?
Zerrin says
Hi Chris, you can cover the top with a piece of cheese cloth or fresh grape leaves (that's what mom does) so that you prevent air. If the olives on the top are still exposed to air and they go bad after the brining process, you can just throw them away. I mean just the ones on the top. The rest will remain fine.
Ari says
Hi there! This looks great! If i wanted to add chilli/garlic etc, can i do this while they're resting in the brine, or wait until after theyve been brined and then add other flavours??
Zerrin says
Thank you Ari! Wow! Never thought of adding flavors into the brine. Great idea! Never tried it before, but I think it's okay to add those flavors to the brine. Will try it next time I make this recipe.
MEAl5 says
The recipe looks great!
Adina says
Wow, it never occured to me that one could brine olives at home. They look great, I wish I could do it, but I have never even seen fresh olives... 🙁
Zerrin says
Hi Adina! I'm sure you would love it if you could find fresh olives. Have you checked the online stores? Maybe you can find them there.
T, Rahuma says
thank you very much indeed.