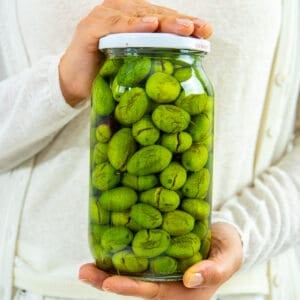
How to Cure Green Olives (With a Simple Brine Method)
Cracked green olives cured in a simple saltwater brine. A traditional method for removing bitterness and bringing out rich, savory flavor.
INGREDIENTS
- 2 pounds green olives
- 1 liter water
- 2 tablespoons kosher salt
INSTRUCTIONS
- Wash and sort the olives: Give your olives a good rinse under tap water. While you're at it, keep an eye out for any damaged ones or those with holes. Toss these out.
- Crack the olives: Take a mallet, the flat end of a jar, or even a stone, and gently tap each olive. You want to crack them just enough to see a bit of the flesh, but not so hard that you damage the pit. And, from our own experience, it's best to do this by hand, one olive at a time. There are gadgets out there that promise to make this step quicker, but we tried one and it was a letdown. A lot of our olives got squished instead of cracked.
- Keep the pits in the olives. This isn't just about texture – the pits help keep that classic olive taste. Olives can lose flavor if they're pitted before the brining process.
- An alternative way: Instead of cracking, you could make a small cut on each olive with a sharp knife. We find olives stay firmer when cracked, but this is up to you.
- Soak the olives in water: Put your cracked olives in a big jar and fill it with cold water. To make sure the olives stay under the water, put something heavy on top, like a small plate or grape leaves (that's what folks do back home).
- Change the water: Do this once a day for about 10 days. After this time, taste an olive. If it's still bitter, keep changing the water for a few more days.
- Make the brine: To get the mix right, fill a container with water, add salt, and stir.
- Brine the olives: Once your brine is ready, pour it into the jar with the olives (make sure you've drained the soaking water). The olives should be completely covered. To keep air out, put a piece of cheesecloth over the olives, then put the lid on. In about a week, they'll be ready to eat! They might look a little different – a change in color is normal.
- Optional flavor addition: Before you add the brine, you can put in some extra flavors. Think about adding rosemary, thyme, lemon peel, or chili.
NOTES
- Crack Carefully: When you crack the olives, be gentle. You don't want to hurt the pit inside.
- Keep Pits: Don't take the pits out. They help keep the olives tasty.
- Change Water: If you're soaking the olives to remove bitterness, remember to change the water every day.
- Make Enough Brine: If you have more olives, you can make more brine. Just use the same ratio of salt to water.
- Seal Tight: When you put the olives in brine, make sure the jar is closed tight. This keeps air out.
- Don't Use Hands: After opening the jar, use a spoon to take out olives. Touching them with your hands can bring in germs and spoil the brine.
- Store Right: Keep the jar in a cool, dark place. They keep well for a year.
- The nutrition facts are assumed for canned olives.
NUTRITION
Calories: 1315kcalCarbohydrates: 35gProtein: 9gFat: 139gSaturated Fat: 18gPolyunsaturated Fat: 12gMonounsaturated Fat: 103gSodium: 28155mgPotassium: 384mgFiber: 30gSugar: 5gVitamin A: 3565IUCalcium: 510mgIron: 5mg
Nutrition information is automatically calculated, so should only be used as an approximation.
ADDITIONAL INFO
Tried this recipe? Leave a comment below!